Vacuuming under the bed is more than just a chore; it’s a critical step in maintaining a clean, allergen-free environment in your bedroom. Often overlooked, the space beneath our beds can quickly become a breeding ground for dust, pet hair, and other debris. These unwanted guests not only compromise the cleanliness of our space but can significantly affect the air quality, leading to potential health issues such as allergies and respiratory problems. The task, however, is not without its challenges. Many people struggle with accessing this tight space, hindered by the limited clearance between the bed and the floor. Additionally, there’s a common misconception that the area under the bed doesn’t accumulate as much dust or debris as more exposed areas, leading some to neglect this crucial cleaning step. In reality, the sheltered nature of this space allows for the accumulation of a significant amount of allergens, making it all the more important to tackle. Understanding these challenges and misconceptions is the first step in changing our approach to vacuuming under the bed, setting the stage for a cleaner, healthier living space.
Preparing to Vacuum Under the Bed
Clearing the Area
Before embarking on the journey to achieve a dust-free zone under your bed, the initial step is crucial: preparing the area. This preparation begins with a thorough clearing of the space beneath the bed. It’s a common sight to find storage boxes, shoes, and a variety of other items tucked away under beds for convenience. However, these items can significantly obstruct the vacuuming process. Carefully removing them not only ensures that you have unimpeded access to the entire area but also prevents any damage to your belongings or the vacuum cleaner itself. Once the area is cleared, the focus shifts to selecting the appropriate vacuum cleaner for the task at hand.
Choosing the Right Vacuum
Choosing the right vacuum is pivotal for an effective and efficient cleaning process. The key is to find a vacuum that not only fits comfortably under the bed’s clearance but also comes equipped with the necessary attachments to tackle this specific challenge. For beds with limited space underneath, a vacuum with a low-profile design or one that offers a flat extension wand can be particularly beneficial. Attachments like crevice tools or under-appliance wands are indispensable for reaching into the deepest corners and ensuring that no dust bunny is left behind. Moreover, for those seeking a more hands-off approach, robotic vacuums can offer an excellent solution, provided they are compatible with the bed’s clearance. Taking the time to prepare by clearing the area and selecting a suitable vacuum sets the stage for a successful and thorough cleaning, paving the way for a cleaner, more allergen-free bedroom environment.
Step-by-Step Vacuuming Techniques
Manual Vacuuming Method
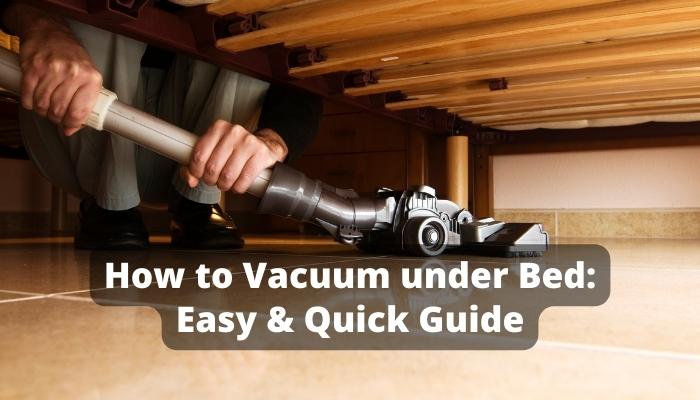
Mastering the art of vacuuming under the bed requires a methodical approach, whether you’re guiding the vacuum by hand or delegating the task to a robotic assistant. For those opting for the manual method, the process begins by positioning yourself at one corner of the bed. This initial position is strategic, serving as your starting point for a systematic journey around the entirety of the bed’s underside. The goal is to move slowly and deliberately, ensuring that the vacuum’s suction covers every inch of the floor. This meticulous progression from corner to corner guarantees that no spot is left untouched, effectively removing dust, pet hair, and other debris from every crevice. It’s a dance of precision, one that requires patience and attention to detail to ensure complete coverage and a truly clean space.
Using Robotic Vacuums
On the other hand, for those who prefer a more technological approach, robotic vacuums like the Roomba or Shark offer a hands-off alternative. However, their effectiveness is contingent upon proper preparation of the space. Before unleashing your robotic cleaner, it’s essential to survey the area for any obstacles that could impede its path. This means ensuring that the floor under the bed is free from cords, small objects, or anything else that might cause the vacuum to stall or get stuck. Additionally, for robotic vacuums to navigate and clean efficiently, they require a clear perimeter around the bed. This doesn’t mean you need to strip the room bare but rather organize the space in a way that allows for unobstructed movement. By preparing the area thoughtfully, you enable your robotic vacuum to do what it does best: autonomously navigate and clean the spaces under your bed, providing a hassle-free solution to maintaining a dust-free environment.
Whether choosing the manual route or relying on a robotic vacuum, each method demands a unique set of steps and considerations. By following these detailed approaches, you ensure that the space under your bed is not just cleaned, but thoroughly sanitized, contributing to a cleaner, healthier living space.
Tips and Tricks for an Effective Clean
Utilizing Attachments
Navigating the nuances of vacuuming under the bed can be transformed from a daunting task to a straightforward routine with the right tips and tricks. A crucial aspect of achieving an effective clean lies in the adept use of vacuum attachments. Tools such as crevice tools or under-appliance wands are designed to conquer the challenges of tight spaces and low clearances. The crevice tool, with its slender and elongated shape, is perfect for sneaking into the nooks and crannies that a standard vacuum head might miss. Similarly, under-appliance wands, often featuring a flat and wide design, slide effortlessly under beds, allowing for the removal of dust and debris from areas that are otherwise inaccessible. These attachments are indispensable allies in the battle against dust bunnies, ensuring that every inch of space under your bed is thoroughly cleaned.
DIY Solutions
In instances where specialized tools are not at hand, or if you’re looking to enhance your vacuum’s reach and versatility, DIY solutions can be surprisingly effective. A simple, yet innovative approach involves attaching a cardboard tube, such as the kind found in the center of a paper towel roll, to the vacuum hose. This makeshift extension can be manipulated and bent to fit into tight spaces, offering a custom solution to the unique challenges posed by the space under your bed. The cardboard tube acts as a conduit, directing suction to areas that were previously thought to be unreachable. With a little creativity and resourcefulness, this DIY hack can significantly amplify the effectiveness of your vacuuming efforts.
These tips and tricks, combining the strategic use of attachments with inventive DIY solutions, not only make the task of vacuuming under the bed less cumbersome but also elevate the cleanliness of your bedroom to new heights. By harnessing these techniques, you ensure that every corner and crevice is free from dust and allergens, contributing to a cleaner, healthier living environment.
Maintaining a Dust-Free Under-Bed Area
Incorporating Regular Vacuuming
Ensuring the space under your bed remains a dust-free sanctuary requires a proactive approach, blending regular maintenance with strategic measures to minimize dust accumulation. Incorporating under-bed vacuuming into your regular cleaning routine is not just a task—it’s a commitment to the ongoing health and cleanliness of your sleeping environment. This routine doesn’t need to be daily; even a bi-weekly or monthly schedule can significantly reduce the buildup of dust, pet hair, and other allergens. Regular vacuuming prevents these particles from accumulating to levels that can impact air quality and exacerbate allergies. It’s about creating a consistent habit that acknowledges the importance of this often-neglected space, ensuring it receives the same care and attention as more visible areas of your home.
In addition to regular vacuuming, adopting strategies to minimize dust accumulation can further safeguard the cleanliness of your under-bed area. One effective measure is the use of bed risers. By elevating your bed, you not only gain additional storage space but also increase the airflow beneath it, which can help to prevent dust from settling. Furthermore, for those utilizing under-bed storage, opting for containers with lids can drastically reduce the amount of dust that collects on your stored items. These lids act as barriers, deterring dust and ensuring that the space remains organized and clean. Such storage solutions not only help in keeping dust at bay but also contribute to a more orderly and aesthetically pleasing bedroom.
Minimizing Dust Accumulation
Combining the diligence of regular vacuuming with practical measures to minimize dust accumulation offers a comprehensive approach to maintaining a dust-free under-bed area. It’s a strategy that pays dividends not only in the cleanliness of your bedroom but also in the overall health and wellbeing of its occupants. By embracing these practices, you transform under-bed cleaning from a sporadic chore into a seamless aspect of your home maintenance routine, fostering a cleaner, more inviting sleeping environment.
Frequently Asked Questions (FAQ)
- How often should I vacuum under the bed?
Ideally, aim to vacuum under the bed every two weeks to keep dust and allergens at bay. If you have pets or allergies, you might want to do it more frequently.
- Can I use a robot vacuum under the bed?
Yes, robot vacuums can be a great option for maintaining cleanliness under the bed, especially if they are slim enough to fit. Just make sure the area is clear of any objects that could obstruct the robot’s path.
- What if my vacuum can’t fit under the bed?
If your vacuum can’t fit under the bed, consider using attachments like a crevice tool or a flat extension hose. Alternatively, a handheld vacuum can be a versatile tool for reaching tight spaces.
- How do I clean the vacuum after using it under the bed?
After vacuuming under the bed, empty the dust container or bag, and clean the filter according to the manufacturer’s instructions. Also, remove any hair or debris from the brush roll to keep the vacuum running smoothly.
- Are there any precautions to take when vacuuming under the bed?
Be cautious of loose items that might get sucked up or tangled in the vacuum. It’s also a good idea to wear a dust mask if you’re sensitive to dust or allergens.
Final Thoughts
As we conclude our journey through the nuanced task of vacuuming under the bed, it’s paramount to underscore the profound impact this seemingly mundane chore has on maintaining a clean and healthy bedroom environment. The space beneath your bed, often out of sight and out of mind, plays a pivotal role in the overall cleanliness and air quality of your sanctuary. Regularly removing the accumulated dust, debris, and allergens from this area not only enhances the cleanliness of your bedroom but also safeguards your health, reducing the risk of allergies and respiratory issues. It’s a testament to the idea that true cleanliness encompasses every corner of our living spaces, especially those we don’t readily see.
I encourage you, the reader, to embrace the tips and techniques shared in this guide. From selecting the right vacuum to employing strategic DIY solutions and adopting a routine that prevents dust buildup, each piece of advice is designed to streamline your cleaning process, making it more efficient and effective. These practices are not just about cleaning; they’re about creating a healthier living environment, one where the air is fresher, and the space feels genuinely clean.
Let this guide be a catalyst for change in your cleaning routine, inspiring you to pay closer attention to the hidden spaces within your home. By incorporating these strategies into your regular cleaning regimen, you’ll not only achieve a cleaner bedroom but also enjoy the peace of mind that comes with knowing you’ve created a healthier, more welcoming environment for yourself and your loved ones. Vacuuming under the bed might once have seemed like an arduous task, but with the right approach, it can become an integral, manageable part of maintaining your home’s cleanliness and your well-being.